Share
Pin
Tweet
Send
Share
Send
The optimal outerwear for the Russian winter is beautiful, high-quality, fashionable and ... practical. It’s easy to guess - this is a sheepskin coat. And lovers of sewing with some experience easily sew it with their own hands.


But before embarking on sewing, you need to decide which style and style select. Indeed, even an artificial sheepskin is not cheap, but this winter coat will retain its beautiful appearance for more than one season. Yes, and you can wear it both daily in the office or for a walk, or wear it with an evening outfit. A sheepskin coat is especially convenient for energetic city dwellers who prefer emphasized fashionable and at the same time ultra-comfortable clothes.
Tip: Take a look at what designers offer this season. We assure you that even after a couple of years, your sheepskin coat will look fashionable. And in an extreme case, even an old sheepskin coat is easy to update: add a few fashionable details, decorate with embroidery or appliqués, finally repaint or even make your own prints on it.
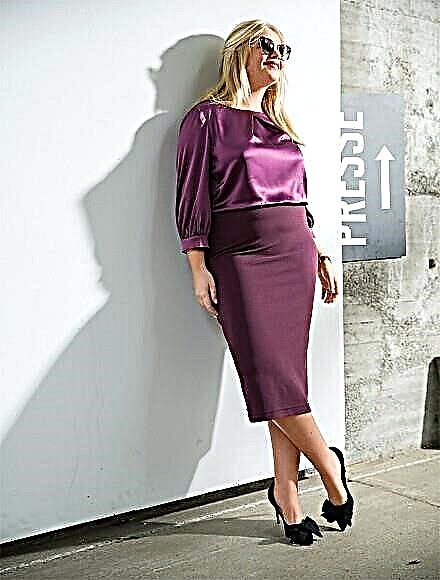
For this season, the collections of designers mainly feature classic colors - black, dark beige, deep gray, light beige, caramel, olive, swamp. For more extravagant fashionistas, bright blue tones, terracotta and burgundy are offered. In fashion contrast between skin color and fur. And as before, there are embroideries, drawings, appliqués, pompons, couplings, mittens on cords, bows, etc. on sheepskin coats.
Styles: trench coat, military, leather jackets, oversize, capes. Sheepskin coats are also relevant with a clear fastener line, large collars (especially shawl ones) and sleeve lapels, with shortened sleeves, with furry flirts (including asymmetrical), with original clasps, with a leather belt or a tied fur belt, with an asymmetric collar and lower brushed leather trim.
Length it can be any, but it is preferable either to short sheepskin coats-jackets, or sheepskin coats-trench coats to the knee.
A NOW MASTER CLASS FOR THOSE WHO SEW

PROCESSING OPEN Slices
FIRST PREPARATION Cutting is made from sheepskin, both natural and artificial, with the leather side laid out in a single layer side up. It will be rational if you retake all the details of the paper pattern twice. As a result, you will get one right and left part. Glue the details of the collar and stand of the collar along the line of the rear middle.
EXTRA-TIP With the help of the “magic” tailor's crayon (Prym) you can draw lines and make markings on the front side. Traces of this chalk disappear without a trace by themselves after about 24 hours, and when ironed - instantly.

CUT
Lay out all the details of the pattern on the leather side and fix them with as few pins as possible (places of punctures may remain) or with adhesive tape. Around the pattern details mark out the allowances. Important: markup with a "magic" tailor's crayon - see "Extra Tip" on the previous page.
5 mm wide allowances should be cut according to the following sections: along the middle section of the back parts, along the shoulder and side sections, on the raised seams of the shelves and the back, along the transverse sections of the elbow part of the sleeves, along the elbow sections of the sleeves; an allowance for bending the bottom of all parts is not provided, for all other seams and for the remaining sections - 1.5 cm. Cut out all the details along the drawn lines.
Cut from the leather side with a circular knife, a scalpel and a safety razor blade, cutting only the skin and not damaging the fur of the fur. To make it easier to hold the blade in your hands, fix it in a cork stopper (see photo).
Thanks to precise cutting, you can refuse to mark the lines of seams. Only make tiny cuts in the allowances for the transverse marks.

SEWING
First we do the transverse seams. Mark with a “magic” crayon along the upper cut of the lower part of each shelf and back, as well as the lower parts of the sleeves, the alignment line at a distance of 1 cm. All the upper parts, except the middle part of the right shelf, lay the lower sections along the alignment line on the corresponding lower parts with the furry side on leather side. Pin and stitch at a distance of 5 mm (see photo). On the middle part of the left shelf, start stitching exactly at a distance of 1.5 cm (allowance width) from the side cut.
 On the middle bottom of the right shelf for the loop, cut an allowance along the markings of the loop to the alignment line. The distance between the markings is 2 mm wider than the diameter of the button. If necessary, move the lateral cross mark according to the diameter of the button. Between the notches, cut off the run along the alignment line.
Pin the upper middle part of the right shelf along the alignment line to the lower middle part of the right shelf and grind at a distance of 5 mm, while starting the stitch exactly at a distance of 1.5 cm (allowance width) from the side cut (see photo).
Then make the following seams, leaving the sections open: the middle seam of the back (right half on the left half), embossed seams of the shelves (middle parts on the side parts). Follow the seam pockets according to the sewing instructions for the model. Then grind the side and shoulder sections, make elbow seams of the sleeves (front parts on the elbow parts).

And now we are processing the corners of the collar and lapels
On the leather side, at the corners of the collar and lapels, draw a “magical” shallow fold line at a distance of 1.5 cm (allowance width) from the cut.

Unscrew the allowance along the cut of the bead on the leather side, mark the edge of the allowance for the seam on the allowance along the upper cut with "magical" fine.

Replace the oversize. Then unscrew the allowance along the upper cut on the leather side and mark the edge of the allowance on the allowance along the bead cut. Spread the allowance again. Between these marks, draw a line with chalk to the marked corner of the collar / lapel.

Fold the collar / lapel with the furry side inward so that the marking lines coincide. Suture along these lines. Cut the seam allowances to a width of approx. 2 mm (see photo). Turn the corner out. Next, sew the sheepskin coat to the end according to the instructions.
Photo: catwalkpix.com; burdafashion.com archive PR
The material was prepared by Elena Karpova.
Share
Pin
Tweet
Send
Share
Send