A quick way to lay out and perform a simple direct tuck.

This life hack is about how to speed up the process of marking and performing simple direct tucks. In this case, it is not necessary to transfer the lines of the sides of the tuck to the fabric, it is enough to limit ourselves to the points of the beginning and top of the tuck.
Main tucks
You will need:
- paper pattern with marked tuck;
- a cut-out part on which a tuck is performed;
- scissors;
- pencil for fabric;
- tailor pins;
- fixing weights;
- sewing machine and thread.
How to make perfect tucks without the hassle
Step 1


On a paper pattern, make small cuts at the base of the tuck and cut out pieces of paper.
Step 2

Make a small hole at the top of the tuck on the paper pattern.
Step 3
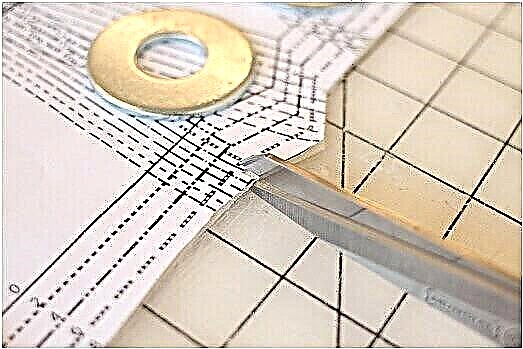

Lay the part cut out of fabric on the work surface with the wrong side up. Lay a paper pattern on top and align them properly with each other. Lock the part and pattern with weights. Use scissors to make 2 small notches at the base of the tuck. At the point of the tip of the tuck, put a point with a pencil for fabric.
Step 4

Fold the part along the edge of the tuck, aligning the notches (the fold line should go through the point of the base of the tuck). Chip the tuck with pins near the notches.
Step 5

Before you start sewing, pull the upper thread so long that it exceeds the length of the side of the tuck by a few centimeters.
Step 6

Tack at the base of the tuck, near the notches.Pull out the left end of the thread and align it with the point of the base of the tuck: this thread will serve as a guide for the stitch line. Follow the line. Done!

Photo and source: blog.colettehq.com